Monday, December 16, 2013

Getting yelped


Our little shop took years to build, and yet at the same time we still aren’t done trying to build it. Operated by my wife Beth at the front desk and myself as the only technician we have taken the path less traveled when it comes to operating an automotive repair shop. Today people from all over the county and even other shops rely on us to solve the toughest problems that can occur on some of these cars. To be that shop, that tech, I have had to work harder than everyone else that I have ever been around both on the job and at home studying when I should have been off the job. That’s an extension of a habit that started in the late 70’s when I was a young technician and was struggling to learn how to be a good mechanic. When someone would say something like “You’ll never be any good” I took the anger and hurt that I felt and used it to push myself to study so that I would be the best technician that I could be and hopefully someday show them that they were wrong. I must say there have been many times that I wish that I would have simply walked from this career away instead of constantly striving to improve myself and my capabilities. Early in the eighties I started studying electronics because of how poor the wages and working conditions were and the plan then was that I was going to quit fixing cars and go make a living working on computers. Little did I know how that education would make me better at dealing with the computerized cars way back then as well as today and that is part of what makes our little shop different.

Have you ever taken your car into a shop for one thing and come out with a list of recommendations that cost hundreds if not a thousand or more dollars?

We don’t up sell maintenance services to try and generate easy dollars like so many places do, I’ve never believed in that approach. Back when that first started the business guru’s were running around telling shop owners “You can’t make money fixing cars, sell services”. They would point out that it took a much more experienced technician (who of course cost more to employ) to fix cars while there were fewer things to go wrong and greater profits if the shop simply concentrated on just doing the easiest work. I had been a technician for about ten years when this was all going down and had been gaining some recognition for my efforts and here were “experts” telling shop owners they shouldn’t be employing guys like me who could take on anything, they only needed entry level people to install tires, batteries, brakes, and to flush fluids.   

It was strange how it turned from I could never be good enough as a mechanic to being too good to allow a shop to be profitable in such a short time but that’s a mechanics life in a nutshell. It seems no matter where a tech is in his/her career there is always someone going out of their way to cut them down, and now I find this little gem of a review in Yelp. “One of the worst experiences I have ever had, the man is very confrontational and insulting. His character and workmanship is very very poor.” Adam W.

Well Adam I’d like to address this with you, but I can’t because there is no Adam W in our customer list. At the same time I’m afraid that I might live up to being confrontational at this point because working  90-100 weeks for the last thirty eight years has me pretty worn out and there just isn’t enough left in the tank to try and stand back up again when someone is trying to knock me down.  The facts are, our regular customer’s opinions of us and our shop don’t match yours. Plus the fact that we are the hero’s to thousands of people who were sent by their regular shop for us to solve a nightmare issue who routinely re-recommend us when someone else is dealing with a tough diagnostic problem.

The interesting part is we don’t actually make a good living dealing with these kinds of problems. The cost of the O.E. scan tools that we have been buying for the last fourteen years, while our competition hasn’t been making a similar investment has been crippling for us. The continued training expense reached a point that it turned into a way to supplement the shops tooling expenses when I started working a second career as a continuing educational instructor.  (That’s how I’ve been hitting the 100/hr weeks of late) Many of the problems that we solve on these nightmare cars take significantly more time to figure out and repair then we can bill for and keep the customers immediate interests in mind. In a lot of ways we prove that the guru’s were right, you can’t make money fixing these cars but that is what our shop is all about and since our customers need us we push onwards, in spite of our own personal challenges.

During the last eight years Beth’s epilepsy got so bad that surgery became the only chance for her to get any relief. Last year they took out the entire right temporal lobe of her brain to try and stop the clusters of seizures that she was experiencing.  Thank-fully that has stopped the periods where she could take twenty to thirty seizures in a cluster every three weeks, but didn’t completely eliminate them. The doctors are now starting to evaluate and try to decide just what to do next. For the moment they are working with the medications and we know not to expect a perfect result but any brief period that see’s her free from events is a blessing.

Three weeks before her surgery we took the only one week vacation we ever had since we got married thirty four years ago, previously we had only one four day vacation back in ’95. We don’t live beyond our means and that’s all we have ever gotten to have. We only took that one before her surgery because we didn’t know what we were going to have after it.

So now you all know a little more about us, and if you want a shop that takes pride at going straight in at a vehicle problem, solves it, and gets straight back out without trying to sell you everything under the sun, then we are who you are looking for. As a three time NAPA ASE tech of the year, an ASE Certified Master Technician since 1982, two time GM Master Technician, a member of the GM Master technician Advisory Council, a technical writer and Instructor, and I even host my own live call in radio show and a RepairPal Certified shop we are doing everything we can possibly do to be ready when you need us. We are far from perfect and sill not afraid to work harder than the guy down the street all while walking  the road less traveled.

Friday, December 13, 2013

Fuse 41 Ford Ranger


A 2001 Ford Ranger was blowing fuse 41 if the vehicle moved at all. A local transmission shop had the truck because when the fuse blew it caused a loss of power to the transmission solenoid pack. When they didn’t find the problem they sent it onto us for diagnostics. When a fuse blows as soon as you plug a new one in, the routine a technician should use is to substitute a load in its place in order to power up the circuit. A headlight works very well for this.  By connecting the headlight in place of the fuse “the short” simply completes the ground circuit that is created and the headlight lights up. Then to do the diagnostics all the tech has to do is follow the current flowing in the circuit to the problem by measuring the current that is flowing and then follow the wiring harness using a low amps current probe. That’s a high tech way to make easy work of what used to be a difficult problem.

With this Ranger the fuse didn’t blow immediately most of the time, but it could blow so quickly sometimes that the truck didn’t even pull out from starting it up. That meant a different approach needed to be taken for this problem. By installing a circuit breaker via a jumper harness the current probe could be connected to the jumper harness and the current that was flowing in the circuit could be monitored. This first capture was the current that was flowing in the circuit when the connections were made and the spike occurred as the technician was getting into the truck to try and take it for a road test.


Here is a low amps probe connected to the circuit with jumper wires and a circuit breaker in place of the fuse.


For a diagnostic tech, that’s a great result for the first test. Just disturbing the body of the vehicle generated a current spike, that’s a classic example of an abraded wiring harness that is grounding somewhere. Now it’s just a matter of finding the location of the harness failure.


Fuse 41 feeds the transmission solenoids as mentioned previously, it also feeds all of the O2 sensor heater circuits and the canister vent solenoid. Most of the circuit is visible without too much effort, the only part that isn’t easy to see is the part of the harness that is inside the transmission. The goal now would be to prove if the problem is inside or outside of transmission portion of harness if possible. If a visual inspection of the harness doesn’t reveal the cause of the problem, then if necessary the plan will be to use a second current probe on just the transmission harness.  That way the next time a current spike occurs, if both current probes show the spike then the problem would be confirmed to be inside the transmission.

Inspecting the harness and the O2 sensor connections didn’t reveal any problems, but when the vent solenoid portion of the harness was checked the harness was clearly abraded and intermittently contacting the bed of the truck.  The repair required the replacement of the pig tail connector for the vent solenoid and by creating some relief for the assembly the wire could be assured to not abrade again in the future.  While this event was very easy and straight forward, by taking a disciplined approach it wouldn’t have mattered if this would have been a more complicated problem. The solution would have been achieved in an efficient manor and that’s the key when it comes to doing diagnostics. A solid diagnostic routine is one that is repeatable and doesn’t fall for the inherent traps that are based on relying on silver bullets. Fuse 41 has been known to fail because of a bad heater circuit inside of any one of the O2 sensors. It’s been known to fail because of problems with the solenoid pack or its harness inside the transmission. There can also be main harness issues as well as the problem this time of the vent solenoid portion of the circuit like this truck, but none of that matters if a tech can come up with his/her own game plan and again be able to take a disciplined approach, he/she will go straight at the problem and that's exactly what the customer needs them to be able to do.

Saturday, December 7, 2013

The Colorado Final, and a Shout to Jim Garrido for the strategy that was used to diagnose it.


The owner took a nice ride up to Erie Pa and did some shopping at the wineries for the holidays. That gave him the trip that he needed to run the fuel out of the truck, and have some real time for the cleaner to do its job. Over the weekend he had a couple more shorter trips and by Monday when he stopped by the shop the smile on his face was promising. He reported that he could clearly feel a difference in the truck, he was certain that its performance was notably improved.  

The thing to do now was to collect some data with the very same checks that were done initially. What was found was at idle the long term trim was 24% and the short term was 19 for a total of 43%. That’s better but only marginally. At 2500rpm no load it was 19% long term and 12% short term. That was clearly better at 31% total trim but still not in control. At 1500rpm in gear against the brakes it was also much improved and in the total range of 30%. Its important to note that the same two monitors were still not complete, the evaporative and the catalyst. With our sudden cold snap, the evaporative monitor not completing was no surprise since a number of the code enable criteria have minimum ambient temperature requirements in the 40f range. The catalyst monitor didn’t run because the fuel trims were still too lean to allow that to take place at idle.  While the fact that the fresh fuel and the cleaner made a difference was promising, there was still a pretty good chance that the truck might need new injectors. The owner planned to return in two days so we could check one last time.

On Wednesday afternoon he returned only this time he reported that the light was back on. However it was running even better than it was on Monday. So what do you do with the light being back on? The right thing to do is approach it exactly as any other repair visit, and that means forget everything you already know while you are doing the diagnostics. With that plan in mind here is what was found with the truck.

The code was a P0171 again, lean air/fuel ratio. The freeze frame showed that it had set at idle. Starting the truck up the total fuel trims were 40%, with the long term being 25% of that. Speeding the engine up to 2500rpm the total fuel trim dropped to 20%, with the long term at 19% and the short term at 1%, that’s a big difference from the previous data! Loading it up against the brakes at 1500 rpm the total trim was below 10% with the long term at 7% and the short term varying around 2%. That’s good enough, not perfect, but good enough. So why was it so lean at idle still, and what would you do at this point?

False air, or a vacuum leak are quite probable now because they will have a big impact with low engine speed and low cylinder charge demand. Under faster engine speeds there isn’t as much time to impact the air fuel ratio, under load against the brakes there is little to no manifold vacuum so a vacuum leak can’t impact the air fuel ratio much at all. That means its time to get the smoke machine out and check for a leak. With the mass airflow sensor at the air cleaner, wrapping the air filter with plastic wrap will allow all of the intake system to be checked. A few moments later smoke was seen pouring out from under the resonance chamber that is in-between the MAF and the throttle body. Pulling it off the breather hose wasn’t connected to the valve cover, and the oil staining in the area suggested that it had been off of there for some time.

Once it was secured back in place, the plastic wrap removed from the air filter and re-installed,  the fuel trims were reset with the scan tool and it was time to re-evaluate the fuel trims. By resetting the fuel trim, the short term trim alone had to make all of the correction, at idle that was now 8%, 2500 rpm no load 5% and against the brakes 5%. The truck was fixed but we weren’t quite done yet, he still needed his emissions test.  In Pa he passes with one monitor incomplete, and in this case that was going to be the evaporative monitor because of the ambient temperature as well as needing to have a cold soak where the coolant and intake air temperatures had to drop within the code enable criteria range.

The customer was provided specific instructions for how to drive a cycle and about twenty minutes later he returned with enough monitors completed to allow the emissions test to run and his sticker finally issued.

This truck and how it was diagnosed and repaired is based on training case studies written into CTI classes by Jim Garrido.  The best way to thank him for sharing this kind of information is to attend some of his classes ASAP.

Monday, December 2, 2013

2005 Colorado Too Lean, continued


At this point the truck is confirmed to be running too lean, but why is it too lean? This could be a fuel quality issue, fuel pressure problem, injector problem or it could be a base calculation error. The more that can be ruled out with scan data, the less physical testing that needs to be done to prove what is wrong.  Some of the things to think about are what information the PCM uses to make its base fuel calculation. GM uses a mass airflow sensor (MAF), and the software takes that MAF value and calculates the engine load and from there what the injector pulse width should be under those conditions to provide the engine with the right amount of fuel.  While on a road test the accuracy of the MAF can be checked by watching that engine load calculation in scan data. During a wide open throttle acceleration a snapshot of the engine data can be captured and then later played back so that the engine load pid can be examined to see if the MAF sensor reported.

During the road test it was easy to get the MAF to report 100% engine load.  So the PCM should have been calculating the correct base pulse width and turning the injectors on long enough for the engine to get the right amount of fuel. However it was still very lean under all phases of operation and the fuel trims were adding 40-45% to the injector pulse width. One note-able observation was that during a hard acceleration where the PCM commands an open loop enrichment to provide full power, all four O2 sensors reported over .88 volts, and then on a closed throttle deceleration they all fell to 0volts showing good amplitude and reaction. At this point it’s back to the shop for the last phase of testing.

Once back in the shop the fuel pressure was confirmed to be at 63 psi, with enough fuel pressure and fuel volume that mean the only two things left that could be causing the problem were fuel composition/quality or restricted injectors. With the vehicle otherwise operating reasonably well there was an option on how to proceed and its one that the customer chose to try. Instead of doing specific fuel quality testing and manually cleaning the injectors, he was to go fill up at a Top Tier fuel station, and add a very specific fuel injector cleaner, Chevron Techron to the tank.  His travel plans included one immediate trip of about 250 miles to start the injector cleaning process and run all of the old fuel out of the tank. Then we would check the fuel trims and see if anything changed after he refilled the tank.

To be continued…

Thursday, November 28, 2013

Fuel trim Issue 2005 Chevrolet Colorado


A few years ago a fellow showed up with a 2005 Chevrolet Colorado with a 4.2l 6cyl. It had a misfire at idle that was proven to be valve seat failure which was common for those engines. We didn’t get to do the repair because of a special policy set up by the manufacturer.

Just this past week the customer came back to us after numerous attempts at other shops to have a check engine light issue repaired. The vehicle couldn’t even have its emissions test run because of two incomplete monitors, the catalyst and the evaporative emissions systems.

When dealing with one of these the first step is to retrieve and write down any codes, check and capture freeze frame and failure record data and then get a good road test in so that you have a good baseline on how the emissions system on the car is functioning.

There was a P0171 set in the computer’s memory, that’s a lean air/fuel ratio code. Checking the freeze frame the code set at 25% engine load and 33 mph, that’s a light throttle condition. Now the question that has to be asked yet is whether this is the only time that the engine is too lean or not. The answer to that is easy, start the engine and get the truck into closed loop. Check the fuel trims at idle, no load and what I saw was the long term trim at +25%, and the short term trim +20%, that’s a total correction of 45% which is a very lean condition. The next step is to try and determine if this is a vacuum leak or some other fuel issue. To do that the engine speed is increased to 2500 rpm while again monitoring the fuel trims. They were still +25% long term and +20% short term just like the no load idle. Generally if the problem is a vacuum leak there will be a smaller correction at the higher speed because there is less time for the leak to impact the air/fuel ratio. The next step is to put the car into gear against the brakes and speed the engine up to around 1500rpm. Now there is almost no manifold vacuum, and a vacuum leak would be nullified if that was the cause of the problem.  The trims were still a total correction in the 40% range.

This is information that is gathered before the car ever moved from the spot the customer parked it at. Think about what the next step should be, and what the possible causes are. I’ll post the next part of this vehicle in a few days.

Saturday, November 23, 2013

Just good people who do a difficult job

A couple years ago NBC news, Jeff Rossen, did a "sting" on auto repair shops using a defective AC relay. Like most of those attempts they found some things that really are bad about the repair trade. The caught some dishonest people and most techs want nothing more than to have people like that out of our trade. At the same time they also found things that are actually bad that they praised!. In the end they really only succeeded in exposing some people who were giving all shops and techs a bad name, but did nothing about the underlying causes for the behavior.

I've made it a point to be a thorn in the side of one of the groups that participated in that sting. They are portrayed as experts and sat in judgment of shops and techs and routinely were giving advice to consumers that was flat out wrong. I always made it clear why I was there, but the individuals who were involved in the sting refused to subject themselves directly to my scrutiny. That was a wise move on their part, they really didn't have anything to gain,  and besides they didn't have the expertise at auto repair that they claimed and I would have made that very evident.

Well this week Jeff Rossen came out with this "sting". It speaks for itself and while not perfect its good enough and for my part I'll steal a line from Harry Potter. Mischief Managed. Maybe the pressure that I brought had something to do with this, maybe it didn't. But it's about time the public gets to see real techs doing what they do everyday, and that's their best to try and take care of their customers.

http://www.today.com/news/could-little-dashboard-light-cost-you-big-bucks-2D11603387

Wednesday, November 20, 2013

I could ony advise the techs to find new jobs as fast as they could.


Another technician wrote a post about a dealership who has restructured their service department so that they have some techs who only do diagnostics, and then they pass the cars onto other techs to do the actual repair. The real kicker is that they take two productive hours off of the regular techs each day to make a pool from which to pay the diagnostic techs. I can only wonder how people who know so little about being a technician get into a management position over them where they get to make these kinds of decisions.


I could see myself as potentially one of the diagnostic guys. What I can't see is handing the work off to someone else once the diagnostics are completed. Fixing the car means also doing the actual repair  because that serves to reinforce the intuitive side of a technicians knowledge and experience. As one of the other posters noted anytime the process doesn't work and a car isn't repaired, who do you point the finger at? IMO, the moment you have to start pointing fingers you have all the proof that you needed to prove that this wasn't a good idea to start with.


Getting good at diagnostics requires just plain getting good at fixing cars, plus a whole lot of hard work on top of that studying and developing as Jim Garrido says a good game plan. I think most of the top techs will agree with me that there were a lot of mistakes on the way to figuring out their game plans, and most of the lessons taught by those mistakes were (and occasionally still are) learned the hard way. One of the toughest hurdles was to learn to take a patient disciplined approach, especially when the store only wants to pay pennies no matter how much time needed to be spent doing diagnostics. I have 1999 Jaguar XK8 in the shop right now that makes for a good analog.


A week ago a shop sent it to me for a P1646 which his information showed to be fuel pump #2 relay control circuit issue. Except that the #2 pump is only used on the super charged cars, so right away he had no idea what was going on with this car. It took some researching and it turned out that P1646 is for the heater circuit upstream sensor bank A. But instead of having me go through the steps to prove what the failure was and complete the repair the shop stopped the diagnostics and took it back to their place to just throw a sensor in it. In the process of doing that they bought a "very inexpensive one" compared to the O.E. that I would have recommended and to install it they had to splice the connector from the original sensor. Two key starts later, the light was back on and the code had reset, so now they wanted it tested completely.


If you are able to look at that paragraph and see quite a few miss-steps, from not fully diagnosing the problem at any time, to them having inadequate service information, and then using questionable parts and repair habits you see how a lot of shops run. By the numbers, however 95% of the time they were going to get the final outcome correct by just slamming that sensor if they had only used a quality part so one can argue there is a potential reward for that approach. However instead of fixing the car, they added yet another variable to the problem and that has both of us further away from fixing the car than they were a week ago. At least they broke tradition at this point and are going to let me prove what is going on before they just slam another O2 sensor even if it is the correct part this time.


The real problem isn't whether what that dealer is trying to do is legal or not, it's how many things will go wrong with it because management hasn't thought it out completely.

The above scenario where some techs are doing the diagnostics and while others are replacing the parts are going to create a lot of Jaguars, and when they slam the parts and get it right they will turn around and feel that the lower level tech was all they needed. While if they still rush it at all they will defeat the whole idea of having the diagnostic techs in the first place and that's when the finger pointing will start. One of the worst parts of this is they have just added a glass ceiling to the career path for the next generation of techs who should be learning to be their diagnostic techs of the future, and they are taking two hours off of them each day  to pay for all of this. To me that shows that they don't care about technician retention nor does the management understand the long term technician career path.

Thursday, October 24, 2013

Getting your car ready for winter


Times have changed and so have the cars here are a few tips.

Rotating your tires is still a routine exercise but today your car may require the TPMS (Tire Pressure Monitoring System) to be retrained after you rotate the tires so that the dash reports the correct pressures and tire locations. Putting the system into training mode can be as easy as one GM system where having the key on and holding the lock and unlock buttons on your key fob until the horn sounds two times. Then you can first go to the left front tire and let out some air from the tire and the horn will beep one time. The horn beeps when the system receives the tire pressure sensors signal which goes into a fast update when the tire pressure changes rapidly. Continue the retraining by going around the car to the right front and repeat the step of letting some air out, then onto the right rear tire and finally the left rear tire. When the last tire is trained the horn will beep twice again instead of just once.  If you only get one beep at each wheel you may have to access the spare tire as well. The last step is to then reset all of your tires to the proper specification which will be on a label on the driver’s door or its frame. This was just one example, there are a lot of different systems out there so consult service information or your local shop for your model.

Time to change your oil?

There was a time that the only thing you needed to know was the SAE grade and to look for the API and ILSAC ratings. Today even the simple oil change is much more complicated. Specifications like GM’s dexos1, Chrysler’s MS6395R, Ford’s WSS-M2C930-A all greatly exceed the current API SN and ILSAC GF5 ratings. The engine oil life monitor systems on today’s cars countdown start-ups, mileage driven, temperature conditions and will alert the driver once it’s time to have the oil and filter changed. While conventional oils may last the 6000 miles that Honda and other Asian manufacturers require, they often do not last long enough for Ford and GM vehicles which can call for serices to be done in the 7000 to 10,000 mile range while a manufacturer like BMW may reach 15000 miles.

Is it time to replace your battery?

For many people replacing a battery when it gets to be five years old is simply about buying the peace of mind that they know the car will start once the bad weather really hits. For others they will make that battery to go until they know that it needs to be replaced. Either way there is more to it than just dropping in a new one. One step is to attach a memory minder so that the car doesn’t get completely depowered while the battery is replaced. That’s pretty convenient for not needing to reset your clock and the radio stations but it also keeps the other memories on important computer systems from being cleared which can have some unpleasant surprises. Another important issue is today the charging systems are computer controlled and it has been adjusting to that older battery and that will cause it to charge the new one incorrectly if that isn’t reset. Many techs associate that with manufacturers like BMW, when in fact just about every manufacturer has this function. Once again consult service information for specific details about your car.

Engine Coolant, Antifreeze

Beware of claims of universal antifreeze, there is no one size fits all specification. Some manufacturers require silicates, while others ban them. The same goes for phosphates, and borates which are all good for some things that may be used in a car’s cooling system and can be bad for others. When you go to the parts store to buy new antifreeze consider buying it pre-mixed where you don’t add water. That saves you an important step that most don’t realize. Antifreeze isn’t designed to be used with tap water, if you buy concentrate you are supposed to mix it with distilled water.

Did your doors freeze and get stuck closed last year?

A little silicone spray on the rubber door seals will displace the moisture that can freeze and make it difficult to open the door in the morning.

Do you need to use dry gas or injector cleaner?

Gasoline today is up to 10% ethanol which is an alcohol. “Dry gas” is normally isopropyl alcohol, and a common property of each is they like to be in solution with water more than they do gasoline. Dry gas never took water out of fuel, it simply helps prevent any water in the system from freezing, so no,  you really shouldn’t need to use a dry gas additive anymore  but injector cleaner is different. Using an extra injector cleaner additive can help keep your car running better and a good rule of thumb is use it once a year or every 25,000 miles. Manufactures like GM recommend Chevron Techron especially if you normally don’t purchase a Top Tier fuel. That’s a subject you should Google, Top Tier Fuel, there is a difference in gasolines that you can run in your car.  


Not Ready For Testing


Not Ready For Testing.

This is a common problem that we deal with a couple times each week ,  usually the story goes something like this.

The car was due for inspection and the check engine light was on so it failed the emissions test. During the course of the repairs the codes get cleared and then the owner is told that they have to drive the vehicle for a while to try and get the car ready for its emissions test but it keeps coming up not ready. 

The OBDII emissions test is really carried out by the car every time that it is driven, all the states emission test does is collect the cars data as it reports if it passes or fails. When someone clears the codes they also clear all of the test results that make up the monitors that the state needs to see completed in order to know if the car is operating correctly or not. If all of the tests that make up a given monitor didn’t get to complete, then that monitor won’t be set to ready. When we have to deal with one of these situations, understanding what it takes to get given tests to run is very important because tests can be stopped from running because of the car’s operating environment failing to meet certain minimum criteria. One example of that could be if the ambient temperature was too low or too high or if the engine coolant temperature did not stay within the programming limits. Both of those would be considered blocking conditions where the tests are prevented from running because the results would be too unpredictable. There are other times where the vehicle might not have been driven long enough to ensure full system operating temperatures. Some of those aren’t even directly measured but are inferred by operating conditions such as the catalytic convertor temperature. The engineers use modeling to try and predict how hot the catalyst would be based on the way the vehicle was driven, then with a catalyst at that temperature, they measure the oxygen storage capability of the catalyst and write the testing tables for the vehicle’s computer to run.

Once we have confirmed that no blocking conditions are occurring, we then have to make sure that each test enable criteria is met. This is easy to do in some cases with a scripted drive cycle that most manufacturers publish, or it can be done with a scan tool as in Chrysler’s case where the scan tool displays the parameter limits and the vehicle just has to be driven within them for a period of time.

If a test fails and it’s a two trip test, you will find a trouble code but it is set in global mode seven and those are known as pending codes.  They have to fail twice in a row to turn into a confirmed code and cause the check engine light to come on.

Saturday, October 19, 2013

2002 Rendevous won't shift

This vehicle just had a used transmission installed and it wont shift correctly. When in drive it starts out in third gear, and once up to about 30mph it shifts into second. Then at forty it shifts to third for a few seconds and then goes into limp in mode, which is back to second gear. Reverse operates normally. Typically the limp in or failsafe modes for an electronically controlled transmission will give you one forward gear, which is what ever gear both shift solenoids turned on creates, and you will have reverse, neutral and park. All of these are commanded by the manual valve which is directly linked to the shifter cable. The computer in the car was setting a P1875 for the pressure control solenoid circuit open.

To test for the cause of that code, the technician needs to access the PCM which is inside the air cleaner housing. On connector #2 pins 44 light blue / white, and 45 red / black provide the feed power to the solenoid and the ground return to the PCM. By unplugging the connector at the PCM the resistance of the circuit can be measured and the circuit was open. The next step is to find out where and why the circuit is open and then plan to do the repair. One of the easiest things to do is to remove the connector at the transmission and jumper the two pins together and then ground one at the PCM connector and provide power through a small lamp. In this case something that draws 1.5 to 2 amps such as a brake lamp bulb. The lamp lit up confirming that the wiring was OK, and that means that the problem is inside the transmission or with the connector itself.


The following two pictures are screen shots captured with my bore scope.
The red arrows point out the damaged pins, note the second one on the top, right hand row and the fourth one are pushed out of place, while the third is bent up out of line.

Most of the time when a connector is damaged like this it isn't a big deal to disassemble and repair it. Unfortunately with the way this connector for the transmission harness is assembled, that's going to mean that the transmission will have to come apart to access the other side of the connector.

Saturday, September 28, 2013

Caring for the customers

Typical call, the owner has a van that he does all his own work on and it failed the emissions test. Being a 95 it gets the TSI which is a two speed idle test in Western Pa. My first thought was it's a van, yuck. I've never liked working on them and the older I get and the harder it is to move around it just gets more unpleasant. The guy was fun to talk to however and he wasn't really too interested in repairing it right now as much as he wants to do just enough that it qualifies for a waiver sticker. To get a waiver in Pa the owner only has to spend up to $150 attempting to repair the car. Only certified repair technicians can authorize a waiver so he was told to call us. When diagnostics and repairs are done by a shop the whole bill can be applied towards the waiver fee. If the owner does the work himself only the parts that were used qualify and he has to provide the receipts for the parts, have two failed emissions tests and then the technician has to confirm that the work was done and follow the rest of the routine to authorize the waiver. The customer had only put on about $70 in parts so he didn't qualify for the waiver yet, but they could be applied towards it and if we do the diagnostics that would get him to where he needs to be. He joked about just getting a bill to put him over the limit but I have my policy on that and if he has to spend a dime we make sure that he gets some value out of the expense and we really work towards making an improvement in the vehicles performance. (I won't throw parts for the sake of throwing parts). The last thing we agreed on was since this is a (conversion) van and the engine cover needs to be removed, he would pull the passengers front seat and have the engine cover fully exposed so that I would not have to spend any time doing that. He set his appointment for this morning (Friday).

This morning he called to let us know that he couldn't keep his appointment today. His son went into sudden cardiac arrest last night and he has been in the hospital with him all night and he had to head back there. The worst part was when he said that it doesn't look good for his son. Meanwhile he was apologizing for not being able to make it in and was worried that it would be an issue for us. All I could do was offer our sympathies and let him know that we would add his son to our prayers and re-assured him that his family was more important and taking care of his van can wait. We will be there for him when he is ready, and for him to not worry about us because I have plenty of work to keep me busy. Just thinking about what he was going through put a dark cloud on the whole day.

Thursday, September 19, 2013

Silver Bullets don't make for a real diagnostic routine


In one of the classes I present I have a point where I paint a little picture for the techs and the shop owners and it goes like this.

Picture you have a 2005 Chevrolet Malibu come into the shop and its setting a P0101 Mass Airflow sensor performance. You test the system and confirm the sensor has dropped out of calibration, replace it and road test the car confirming that it is indeed repaired.

Now imagine nineteen more Chevrolet Malibu's and every one of them set that same P0101, and every one of them is repaired by replacing the mass airflow sensor. "How do you approach the twenty-first Malibu that shows up at the shop setting a P0101?"

In your perspective Steve, (Steve is a moderator on another forum) and in the ideas of anyone who works like you are thinking, you would replace the mass airflow sensor and ship the car. But what if that doesn't fix this car and the light comes back on setting the same code? In that customers eye's they got ripped off, you don't know what you are doing, and they would be correct. (Never mind the fact that you got it right twenty times) The correct answer for that twenty first Malibu should have been to test it exactly the same as you did the first one, and the nineteen in-between and the details would have led you to find the restricted exhaust, or whatever caused the volumetric efficiency of the engine to fall below design expectations. That by the way is what the code really means which is that the airflow being reported by the mass air sensor at a given engine speed and throttle opening is below the threshold value. Sure a sensor under-reporting the airflow will generate that code but its not the only reason that could happen.

The trap here is someone who pulls the code, and throws the part if they get it right can be really fast and can in fact make themselves more money while they are risking getting caught doing sloppy work. The tech who stays disciplined in his/her approach gets it right every time, but since that takes longer, they actually in many cases make less money by the end of the week. What's worse is when that twenty-first car comes back, shops often direct that not to the tech who did the first repair, but to the one who will make sure to figure out what is wrong and solve the problem. Oh, and since its a comeback that means the customer likely isn't getting charged so there is no diagnostic time to be paid and that means the tech isn't getting paid either, well at least not directly. When I worked at the dealership they would promise to "make up the time" by giving me pre-delivery inspections, or other gravy tickets. (The same kinds of work that have grown to be known as wallet flushing)

As far as finding sites dedicated to mechanics that you mention, there are other sites that you likely have never been to that don't advise techs to rely on silver bullets. In fact we prove why trying to do that hurts them as well as the customer and the trade in general. As part of a group (Edmunds) that tries to advise consumers correctly it makes no sense to continue to promote poor habits as if they are really valid. More than 50% of what I do each day is something I've never seen before and likely won't see twice in my career. That's why problems like the fuel pump wiring harness issue mentioned wouldn't even be a note-able event. Nine months the guy fought with that problem that should have been addressed in under an hour. I do blame the perspective that having to rely on someone seeing that failure before in order to solve it is what it took. That's totally false and misleading for the consumers.

Imagine diagnosing a loss of communication between the computers on a Mazda where the chip in the transmission controller that drives the communication signal is failing and causing it to send out a pulsed wave that steps on other modules communication bits. Now also understand that the body computer also acts as the connection hub for the high speed CAN "STAR" network that this is crashing and multiple modules connect to it in ganged plugs. On that car it just so happens that the PCM shares the same plug as the transmission controller, and since the PCM has one of the termination resistors in it so disconnecting that plug shuts down the entire bus the moment that it is disconnected. On top of that, once the network shuts down the problem disappears and it then will take up to half an hour of operation for it to re-occur. That's the kinds of problems that guys like me often deal with today, and tonight I'll be demonstrating how to figure that car out to the techs that are in the class I'm teaching. Just taking the idea that the network is crashing and saying that the transmission controller needs to be replaced isn't good enough because that's what fixed that one car. As a shop you'll make yourself and your tech look foolish when that doesn't work the next time because there is a different cause for the loss of the network. That's the way a techs job really is and the silver bullet stuff needs to be put away with the points and condensers.

#Silver Bullet, #silver, #bullet, #CAN, #wallet flushing,

Friday, September 13, 2013

I'm going to try and upload a little video. This is my Escape with just over 30% oil life left on the monitor and the engine has a little over 65,000 miles.

Steve on Edmunds posted that he was irritated by a picture of an engine that was nearly spotless inside at some 100,000 miles. Well maybe he should be irritated if his engine doesn't look like this inside. BTW the average mileage for each service is 7400 miles, with a high of 9100 one time when there was still 9% oil life left. At our shop we only use oils that meet the O.E specs, that doesn't mean it has to come from the manufacturer but it takes a little more effort to choose the correct product for your car than to just look for the viscosity on a store shelf.


http://www.youtube.com/watch?v=k770HSmZU1c&feature=youtu.be


Tuesday, September 10, 2013

2010 Ford Escape AC. What I found


I finally got to attend to my Escape’s AC, and I wasn’t surprised by what I found.

If you recall the static pressures were taken after the car had been sitting for more than an hour, and with it not working right I had not turned the system on for more than a week. The last thing that was expected was for the high and low pressure sides to not be equalized. Upon seeing that they were not equal, and excessively high on top of that, this wasn’t just a broken car, someone had done something that made it even worse.

The normal routine for a car that a shop isn’t familiar with is to use a refrigerant identifier for the first step, and then a sealant test for the second one. The following photos are from my refrigerant identifier. It gets connected to the low side and a small sample is bled off of the system. In the past some people would substitute propane for R-12, hence the need to detect hydrocarbons, and other blends would use R22 to boost pressures in the systems under the assumption that would force more refrigerant liquid through the expansion valve or orifice tube. In an expansion valve system with a receiver drier, there may be some validity to that assumption but not so much with an orifice tube type system. One other contaminant is air. Just like R22 in an automotive system air, nitrogen and oxygen isn’t condensable into a liquid at the pressures and temperatures that the system runs at.  By not being able to make it change state between a liquid and a gas being in the system forces the pressures higher but doesn’t help the system produce any cooling at all.


So here is the first picture from my identifier, and it shows that there is no R-12, or R-22 in the system.
 
This second picture shows that the refrigerant is R134 but also that 15% of the sample taken was air. So how did air get into the system?
 
 
That we may never know but the identifier just confirmed the suspicion of why the pressures in the system were so high. There easily could have been a service performed where someone’s AC equipment hasn’t been maintained correctly and they may have drawn air into their recycle tank. Maybe the system was discharged and sat open for a period of time and then was charged without being evacuated. That one seems the most likely and could also explain the system having sealant added to it. As you will see in the next photos the sealant was responsible for the system stopping working.


   This is the receiver drier, some of the AC oil can be seen in the connection port and that is the outlet that the hose to the expansion valve connects to. The schreader connection at the top of the photo is for the high side pressure sensor. The next photos are the desiccant cup and filters from inside the drier assembly.


Here is what is inside the drier assembly. The orange plastic circle is the top lock for the filter and the desiccant beads that are inside the black cup, these all fit into the bottom of the drier assembly. The tube passes through the center of the cup so that liquid refrigerant that collects underneath the filter and desiccant cup is fed to the outlet of the drier and onto the expansion valve.


These are the felt filters that are at the top and bottom of the cup, their job is to hold the desiccant beads in the cup as well as be a filter for the system.

In order to make the sealant more visible I took the top filter screen and cut it in half and flipped part of it over. As you compare the picture above and this one, note the swirl pattern visible from the spaces in the orange lock disc, that's the top side. Then on the bottom side you will notice two colors, both a grey and spots of green. The green is the sealant that has crystalized in the felt.


The last two photos are of the expansion valve. There was no way to know if it was OK or not prior to disassembly other than to replace the drier, and then run and test the system. With the system already open it made more sense to simply plan and replace it which also allowed me to flush oil and sealant from the evaporator core as well.


Thursday, August 29, 2013


There are times that take a lot of the fun out of running a shop, and this 2004 Dodge Neon is a good example of that.  About four months ago the car showed up and it was setting a P0344 for a camshaft sensor signal sync error. The scan data at that time showed the camshaft signal missing, and measuring the signal in between the sensor and the PCM confirmed that it was inoperative because of the presence of the five volt reference that comes from the PCM that the sensor pulls to ground when it turns on. The sensor is a Hall Effect design that turns on when a magnet that is attached to the back of the camshaft passes close to it.  The last two checks for the power to the sensor and the ground circuit showed that the power and ground were correct so replacement of the sensor and it’s pigtail connector was indicated. The repair was completed, the code cleared and the vehicle was road tested with no other troubles found.

Monday afternoon the customer calls and reports the same symptoms of surging over 2100rpm and the check engine light is on again. We told him to bring it right down and when he showed up it was working just fine again. Pulling the code the P0344 was set in the history and scan data showed “cam lost last”. At this point there wasn’t much else to do but run the customer home and set up my testing connections to prove where the fault was occurring at.  The car ran fine the whole way to his home and back down to the shop. Leaving it run in the shop with my wife paying attention to it, the circuit failed at some point because the light was on and scan data showed sync  lost, but the signal was fine on the oscilloscope.

Several start and run routines were then performed over the next day and no trouble was identified. When attempting to diagnose a problem like this the only thing that really works consistently when trying to solve them is a good plan and a lot of patience. Many would resort to throwing a camshaft sensor at it and ship it out the door, and of course there is a chance they might be successful. The problem with that approach goes hand in hand with something the customer said during this phase of the testing. He was already losing confidence in the car and started lamenting the idea of replacing it. If a tech guesses and gets it right, the symptom may go away but the customer really has no reason to believe that the car is really repaired and it could act up on him at any time and then he would fear being stranded. The only way to restore his confidence in the vehicle is to be certain that the problem is found. Since leaving it run in the shop wasn’t giving me the information that I needed, the next step is to go on a suicide mission and drive the car and diagnose it when-ever and where-ever the problem occurs. So with the scan tool and the PICO four channel scope connected to the critical circuits it was time to hit the road and hope it acts up.

As luck would have it it didn’t take long to occur, but it did it on one of the worst hills in the area to have a car that wasn’t running right. This hill is about a half a mile long and about four hundred feet high with a blind curve in the middle of it, and there was a few moments this really seemed like it might be more than just a cliché as a suicide mission . Here is a screen shot of the camshaft and crankshaft signals while the problem was occurring.


The advantage of having both of those signals at the same time is that they share their powers and grounds which are both provided by the PCM. With the crankshaft sensor signal operating normally, and the five volt reference from the PCM to the camshaft sensor visible, the problem had to be in between the scope connections and the camshaft sensor. Here is a capture taken while the signals were both operating normally for a comparison.


Armed with this perspective closer examination of the harness and the connector was in order. The camshaft sensor connector isn’t very easy to reach in the car even though its right on the back of the head. (drivers side of the car).  One of the tricks is to grab the harness with a hook tool and start pushing and pulling on it to try and get the signal to drop out. That wasn’t successful, but when I put the tool right on the connector for the camshaft sensor I could push downward and the signal went open, and pull the connector back up towards the sensor and it would start working again.

Here is an important capture that reveals the circuit fault. Can you tell what part of the circuit is failing?


Well that’s great, the car has a new sensor and pigtail that were replaced just four months ago and there is clearly something wrong with one of them. So now it was time to shut the engine down, unplug the connector and pull it up where I could see it and this is what I noticed.


If you didn't see it in the first picture, how about this one?


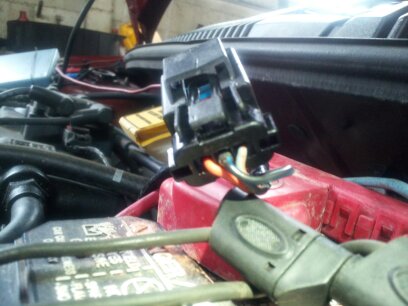
 Here is another view.


Looking from the connection side you can see that the middle pin is pushed part way out of the connector. Grabbing the wire with a pair of needle nose pliers I could push the pin all the way into place, and then pull it right back out. Great, the new pigtail has a damaged pin, or pin retainer.


Taking the connector apart I could see the plastic retainer was damaged, and looking at the pin closely the terminal space was way too small for the camshaft sensor pin to fit inside. The problem was that the pin was originally flawed, and instead of making a good connection to the sensor, it pushed out of position and for the last few months and a couple thousand miles was simply just
touching the middle pin of the camshaft sensor. With the problem confirmed the easiest thing to do was to repair and then secure the pin in place inside the connector.

The vehicle was put back together and road tested again with no more troubles found. We called the customer to let him know what we found and how we fixed it.  When the customer came to pick up his car he wanted to know how much he owed, and well the answer to that was nothing of course, this is how we provide a warranty for our customers. From our point of view this shouldn’t have happened so it’s up to us to make it right if and when anything like this ever does occur. All told some two hours of labor time are gone over a pin that probably cost a penny for some machine to make a hundred of them. We take it on the chin for our customers and in the end all that’s really important is that we stood behind the work that we did and the materials that we sold. Hopefully our customers recognize that it’s how we handle the problems that are as much the measure of our shop as are our successes the first time around. Even so, it’s an easy choice to do the right thing, but that doesn’t make it a very fun thing to do.

Monday, August 26, 2013

2010 Escape AC not cold. Edited version to explain the theory better.


Those pressures should look a little confusing, but they tell quite a story about the condition of the AC system in my Escape and why it isn’t cooling. The static pressures should closely match ambient temperature when everything has gotten to sit and cool off so that it’s somewhere between 60f and 85f. If the under hood temperatures are high than that will push the refrigerant pressures higher as well. But that high side pressure is too high, in fact after sitting for only a few minutes the two sides should have equalized, yet this sat for about an hour and the pressures were almost 100 PSI different.

One test that needed to be run is use a refrigerant identifier, this should be done on every job because you never know what has happened to a system prior to you looking at it. When the system is fully charged some of the refrigerant in it will be in a gaseous state and some of it will be liquid. When the compressor is running, the pressurization of the refrigerant concentrates the heat that it possesses on the high side , and that allows the condenser to dissipate that heat and allow the refrigerant to condense into a liquid.  By taking advantage of the latent heat of vaporization, the refrigerant actually releases more heat than just the pressure change would suggest. From there the refrigerant travels to the expansion valve or orifice tube. As the refrigerant passes through the orifice tube or expansion valve  the drop in pressure causes the liquid to boil and it absorbs heat from the air passing over the evaporator as it turns into a vapor.

There are a lot of things that can contaminate the refrigerant don’t condense into a liquid under the pressures and temperatures that an automotive AC system operates and the result lf them being in the system is typically higher than expected pressures, and very poor cooling. With my Escape  the static pressures are high, but that’s a function of the under hood temperature.
The next thing to do was to start the engine and see what the system did. The high side stayed at 210 psi, while the low side pressure dropped to 30psi and stayed there. Those would be normal pressures except the evaporator outlet tube  temperature was 78f, and that’s way too high.  That surface temperature means that there was no liquid refrigerant left to evaporate and absorb heat. Most techs would expect that with a high side of 210psi , and a low side of 30psi the system should be nice and cold, so why wasn’t it? Is this related to the high side static pressure being much higher than the low side at rest?

The answer to this one is that the expansion valve is sticking, or plugged up with debris sealing it off and reducing, if not completely blocking refrigerant flow. Now if you thinking about this, shouldn’t the compressor pump all of the refrigerant to the high side and pull the low side into a vacuum? It would except for the fact that it’s a variable displacement compressor that regulates the low side at 30PSI, so it simply stops pumping when the low side pressure reaches that pressure. The repair will include a new expansion valve and a receiver drier assembly. I’ll upload some pics of the repair if possible over the next couple of days.   

Be an AC Pro

You've seen the advertisement. AC not cold enough, just buy a can of refrigerant and dump it in and you are a hero, right?

This is my car, and it has not had any refrigerant added to it. The AC has worked fine up until early last week. Then I noticed while we were on the road, the AC was cold, then not cold, then cold again. The impression was that it was low on refrigerant and the clutch was being commanded off.  On Saturday I knew that I was going to have a chance to look at it so I pulled it inside after a quick run to Subway for lunch. It was about an hour later when I got to attach the gages and this is what I found.


The engine was not running, this is the static pressure after the car had been sitting for about an hour.

OK, what does this mean and what is your next move?

Tuesday, August 20, 2013

The Taurus no-start at that point was a theft deterrent issue and the code description was that the key that was being used wasn't learned. This happens when someone gets a new key that the vehicle hasn't been trained to recognize, and it can occasionally occur if a key gets damaged and sends an incorrect response. This can also happen if someone replaces the module that has the PATS function supported in it. What we needed now was another key to see how the vehicle reacted. With the IDS (Ford factory scan tool) we can access the PATS system and train the vehicle to accept the new key. This can also be done with a J2534 tool and a short term subscription to Ford's website. One other thing that had to be done before calling the customer was check to see if the function for a consumer to add a new key was enabled and it was.

I called the customer and explained what we had found and right away she told me that she had a "dummy" key made that was only for opening the doors or trunk. I asked her where that key was and she went over to her desk and said that she got it out and it was in her hand. I then asked what key does she usually use to start the car and she told me that the one that I had was the usual key. Then I asked how many keys does she have in total and she said three.

Hmmmm.

Then the conversation got a little confused as she mentioned that a relative was involved with doing something with the car when it acted up. At that point I asked her if she could come to the shop and bring me the other two keys.

When she got to the shop I took the key that she had provided and showed her that when I tried to start the car it didn't start and showed her that the theft light was flashing. Then I took one of her other keys and tried to start the car and the theft light was still flashing. That's normal for the car to do that because once it sets a theft code it goes into an anti-scan mode and there is a thirty second to two minute wait before it will identify another key. About forty seconds after the key was installed the lamp stopped flashing, I turned the key and the car started.

She told me that was the key that she got out of her desk and maybe one of her relatives had put the wrong one back by mistake. So I tried the other key that she had brought and of course the car started. At that point there was one thing left to do. I turned the car off and waited a few seconds. Then I turned the key to run for three seconds and then turned it off. I did that with the second key that worked. Then I repeated that with the key that she had given us when the car was towed in which allows the car to learn that key. That's why checking to see if the customers key learn function was enabled. Now she had three keys all trained to the vehicle and no more dummy key.

The last thing we did was talk about keeping her battery charged, she told me that since her visit a couple months earlier she did get herself a battery charger but had only used it once. Now she knows she needs to do it about once a week.

Monday, August 19, 2013

When we got to the shop Friday morning there was a white 2002 Taurus sitting there that had been towed in the night before. There is some history on this car, it's typically been worked on by a family friend and about two months ago was towed into our shop after several failed attempts to solve a no-start had to jump the car to start complaint. That turned out to be a combination of issues which included a battery that developed a high rate of self discharge and that was brought about by the owners typical use where she doesn't drive the car long enough each time she starts the car to fully recharge the battery. To maintain a strong battery an average trip should be around five miles with no accessories and could easily be more than ten miles during conditions when a lot of electrical power is being used. (aka headlights, defrosters, wipers, etcetera) The customers average trip is under two miles and only on rare occasions drives five to ten miles. That kind of use over time depletes the batteries reserve capacity and has it operating under a condition of a low state of charge and that leads to sulfation and battery failure. There was a note that said the car would not start, would not crank. The family friend had already replaced the alternator even though it tested OK at the parts store, and had removed and then re-installed the starter after it was tested and shown to be OK. The parts store said that the car needed a new battery.

Think about how you would approach this car and begin your diagnostics. The answer and findings will be in the post just below.
I went out to start my testing and the first step is simply to see what the car does, or essentially verify the reported problem of the car not cranking. When I turned the key to the run position the dash lights all bulb checked, and when I continued turning it to the start position there was no sound at all. The car did not crank, and there were no sounds from any relays being commanded on or off.

Now pause for a moment before reading further what should you do at this point?

The answer is look at all of the lights bulb checking on the dash, go ahead and even turn the key off and back on if you have to in order to see all of them. Some of the critical lamps you want to see are the charging system indictor if used, without the engine running it should be illuminated. You need to see the check engine light, it also should be on. Keep in mind of you leave the key on for ten or more seconds without cranking the engine some cars may flash the check engine light and on some it will go out. We will leave the explanations of why they do that for another day, but if you don't see it simply turn the key off for about five seconds and turn it back on and it should be on again.

During this step I noticed a lamp flashing on the dash, it was low on the right hand side of the cluster and it displayed the word "Theft". Now that's a clue as to why this won't start. It's time to grab the scan tool and my battery tester and see what's happening. Now why the battery tester? If you don't have good system voltage all bets are off as far as how a vehicle will operate. The batteries open circuit voltage was low at 12.1v but passed at 94% health. It needs charged but it doesn't need replaced like the parts store told her. With the scan tool I retrieved a B1601, ignition key not learned or faulty signal from the key.

What's the next step? I'll post the answer in a day or two.